How to Propagate Rubber Plant: Step-by-Step Guide
Quick Summary
- Rubber plants (Ficus elastica) are slower to root than most tropical houseplants — expect 4–10 weeks
- Water cuttings are the easiest to start; air layering has the highest overall success rate
- Always wear gloves — the white latex sap is a skin and eye irritant
- Take cuttings in spring or early summer for the best results
- Let cut ends callus for 30–60 minutes before placing in water or soil
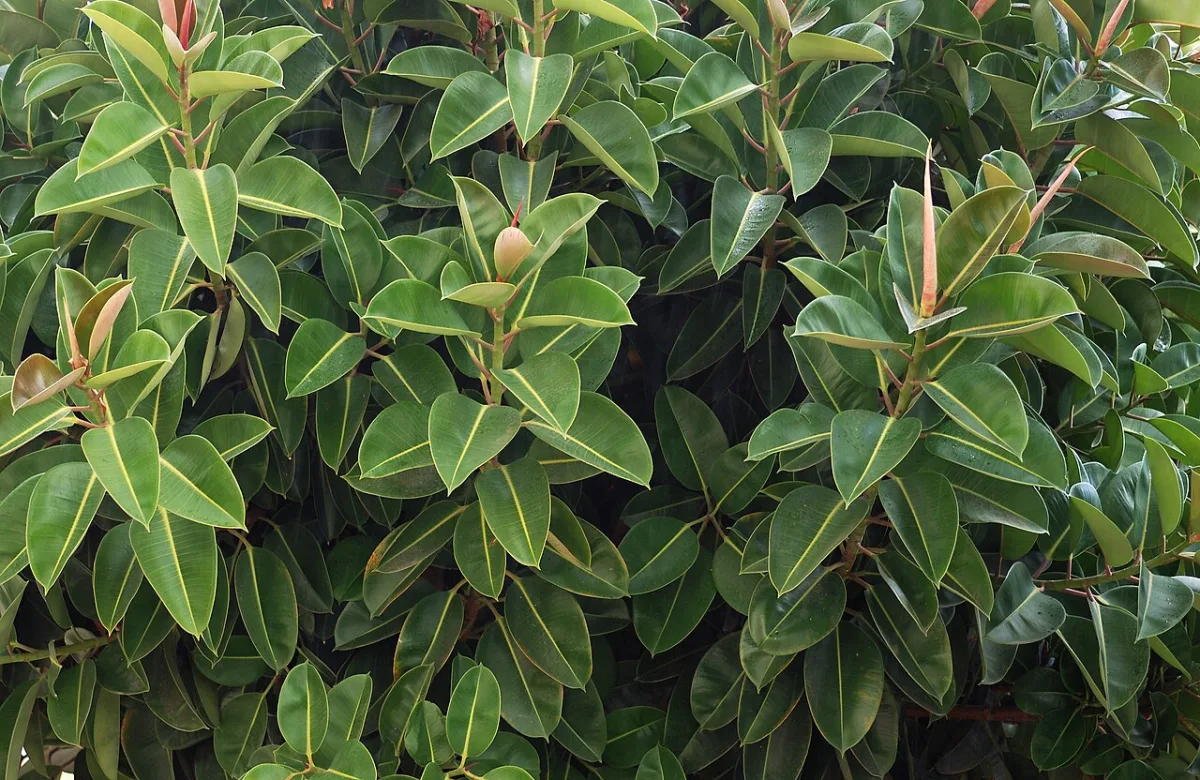
The rubber plant (Ficus elastica) is one of the most striking houseplants you can grow — those large, glossy, burgundy or dark green leaves make an immediate visual impact. And unlike its reputation for being difficult, Ficus elastica is actually one of the more propagation-friendly members of the Ficus family. It roots faster than fiddle leaf fig, tolerates slightly more propagation variation, and air-layers beautifully. The key differences from other houseplants: the latex sap (handle carefully), and the expectation of a longer wait than you might be used to.
Best Time to Propagate
Spring through early summer is the optimal window for rubber plant propagation. As with all Ficus species, rooting hormone production is highest during the active growing season, and root development is significantly faster in warm temperatures (70–85°F / 21–29°C).
Avoid propagating in winter unless necessary. Winter propagation is possible but cuttings may sit for 3–4 months before showing root development, which tests patience and increases the window for rot to develop. If you must propagate in winter, use a heat mat to keep the cutting's base warm and supplement with a grow light to ensure adequate photosynthesis.
The parent plant should be in good health before you take cuttings. A rubber plant that is already stressed, recently repotted, or fighting pests does not have the resources to donate to new growth. Wait until the plant is actively pushing new leaves and looking its best.
Method 1: Stem Cutting in Water
Water propagation is the most beginner-friendly approach and the one most people try first — you can watch roots develop in real time, which takes some of the anxiety out of the wait.
What You Need
- Sharp, sterile scissors or pruning shears
- Rubber gloves or latex gloves
- Paper towels (for the latex sap)
- A clean glass or vase with room-temperature water
Step-by-Step
- Put on gloves. The white latex sap that bleeds from cut rubber plant stems is a significant skin irritant and will stain clothing permanently. Protect your hands and work over newspaper or a surface you do not mind staining.
- Select your cutting. Choose a healthy stem tip with 3–4 healthy leaves. The cutting should be 4–8 inches long. Tip cuttings (from the top of the plant) root more reliably than mid-stem sections for beginners.
- Make the cut below a node at a 45-degree angle. Cut cleanly in one motion — sawing back and forth damages more cells and is less effective.
- Wipe away excess sap. Use a damp paper towel to gently dab the cut end. Too much sap accumulation can seal the cut in a way that prevents root development. Remove visible excess, but do not scrub aggressively.
- Let the cutting callus. Place the cutting on a clean surface for 30–60 minutes. You will see the sap dry and form a very light seal over the cut. This is exactly what you want — it prevents the stem from rotting in water.
- Remove lower leaves. Strip leaves from the bottom half of the cutting. Any submerged leaves will decompose and create bacterial problems. You should have only 1–2 leaves remaining at the top.
- Place in water. Submerge the bottom 2–3 inches of the cutting, ensuring at least one node is below the waterline. Change water every 7 days.
- Keep in bright, indirect light. Warmth and light are the two most important variables. A warm south or east-facing windowsill is ideal. Temperatures below 60°F / 15°C significantly slow root development.
Timeline: Expect the first white root nubs in 4–8 weeks. Once roots are 1–2 inches long, pot the cutting into a well-draining mix.
Pro Tip
Rubber plant cuttings root faster in water when the water is slightly warm. Place the glass on a seedling heat mat or on top of a refrigerator where there is gentle bottom warmth. Target water temperature of 72–78°F / 22–25°C. This alone can cut rooting time by 2–3 weeks compared to a cool windowsill.
Method 2: Stem Cutting in Soil
Soil propagation produces roots already adapted to their final medium, skipping the water-to-soil transition stress. The challenge is that you cannot see root development, which requires a different kind of patience.
Step-by-Step
- Take and prepare your cutting as in Method 1 (gloves, clean cut, wipe sap, callus for 30–60 minutes, remove lower leaves).
- Prepare a 4-inch pot with a propagation mix: 50% perlite and 50% potting soil, or pure perlite. This high-drainage mix prevents the stem base from sitting in moisture while roots develop.
- Dip the cut end in rooting hormone powder or gel. Tap off any excess — too much hormone can actually inhibit rooting.
- Use a pencil or chopstick to pre-make a hole in the propagation mix. Insert the cutting so 1–2 nodes are below the soil surface. Firm the mix gently around the stem.
- Water very lightly — the goal is barely moist soil, not wet. The callused stem end should not be sitting in moisture.
- Create a humidity tent: cover with a clear plastic bag or humidity dome. This prevents the cutting from drying out before it has roots to supply water.
- Place in bright, indirect light at 70–80°F. Open the humidity tent for 30 minutes daily to prevent mould. Mist lightly if the soil begins to dry out completely.
Test for rooting after 8 weeks with a gentle tug. Resistance means roots have formed. Avoid pulling hard — you can dislodge developing roots. Once you feel firm resistance, remove the humidity dome and begin watering normally.
Method 3: Air Layering (Best for Large Plants)
Air layering is the superior method for propagating a mature, large rubber plant — especially if you want to create a second floor-height specimen without waiting years. The technique initiates root growth on the parent plant before any cut is made, resulting in a cutting that arrives in a pot already rooted and rarely goes through transplant shock.
Step-by-Step
- Select a healthy stem section 12–24 inches from the top of the plant, with at least 2–3 leaves above the target wound area.
- Put on gloves. Use a sterile sharp knife to remove a ring of bark 1–1.5 inches wide, cutting all the way around the stem through the outer layer to the harder wood beneath (girdling). Alternatively, make an upward-angled cut one-third through the stem and hold it open with a toothpick.
- Dust the exposed area generously with rooting hormone powder.
- Soak a handful of sphagnum moss in water, then squeeze it until barely damp (like a wrung-out sponge).
- Pack the damp moss firmly around the wound, forming a ball 3–4 inches in diameter around the stem. The moss should fully cover the wound area on all sides.
- Wrap the moss ball completely with clear plastic wrap, securing both ends with twist ties or tape. The seal must be airtight — no moisture should escape. The moss creates a high-humidity environment around the wound that encourages root development.
- Leave undisturbed for 6–12 weeks. Check through the clear plastic periodically. You are looking for white roots growing into the moss and becoming visible through the outer layer.
- Once roots are clearly visible and 1–2 inches long, cut the stem just below the moss ball with clean shears. Remove the plastic, leaving the moss intact around the roots.
- Pot the rooted section into a 6–8 inch pot with well-draining potting mix. Be careful not to damage the roots — if moss is tightly wound around them, you can leave some of it and it will decompose naturally in soil.
Pro Tip
Use clear plastic wrap for air layering so you can see root development without disturbing the moss. Once you see a dense network of white roots filling the visible portion of the moss, wait one more week before cutting. This ensures you have a robust root system rather than just the first few fragile root tips.
Dealing with Latex Sap (Safety)
Rubber plant latex sap deserves its own section because it surprises people who are not prepared:
- Skin irritation: The sap contains latex and proteolytic enzymes that cause contact dermatitis in many people. Reactions range from mild redness to significant inflammation. Always wear gloves when cutting rubber plants.
- Eye safety: Keep sap away from your eyes completely. If sap contacts the eyes, flush immediately with running water for 15 minutes and seek medical advice.
- Latex allergy: If you have a known latex allergy, handle rubber plants with special caution. The concentration of latex in fresh sap is higher than in most commercial latex products, and the reaction can be more significant.
- Staining: The sap is white but dries to a brown stain. It will permanently stain fabric, carpet, and porous surfaces. Work over newspaper and wear old clothes.
- Pets and children: The latex sap is toxic when ingested. Keep cut cuttings away from pets and small children, and discard all paper towels and trimmings where they cannot be accessed.
Rooting Timeline
| Method | First Root Signs | Ready to Pot | Established Plant |
|---|---|---|---|
| Water cutting | 4–8 weeks | 6–10 weeks | 3–4 months |
| Soil cutting | 6–10 weeks (hidden) | 8–12 weeks | 3–5 months |
| Air layering | 4–8 weeks (visible) | 6–12 weeks | Established at separation |
Spring cuttings consistently hit the lower end of these ranges. Winter cuttings should budget 30–50% more time across the board.
Aftercare for New Rubber Plant Cuttings
The weeks immediately after potting a new rubber plant cutting require attentive care:
- Keep humidity high. For water-rooted cuttings especially, maintain 60–70% humidity for 2–4 weeks after potting. Use a pebble tray with water, a nearby humidifier, or loosely drape a clear bag over the plant for the first 2 weeks.
- Avoid direct sunlight. Young cuttings are more sensitive to sun scorch than established plants. Keep in bright, indirect light for the first 4–6 weeks.
- Water carefully. Keep the top 1–2 inches of soil barely moist. The fragile new roots are far more vulnerable to rot than established rubber plant roots, which are famously tolerant of varied watering.
- No fertilizer for 6–8 weeks. Fresh potting mix provides adequate nutrition. Early fertilization can burn developing roots.
- Expect 1–3 leaf drops. A new cutting may drop its lowest leaves as it adjusts. New growth at the tip is the sign that the root system is established and the plant is thriving.
Frequently Asked Questions
Can I propagate a rubber plant from a single leaf?
No. Unlike succulents or African violets, a rubber plant leaf without a node attached cannot produce a new plant. You always need a stem section with at least one node.
My rubber plant cutting is in water and the sap keeps seeping out. Is that normal?
Some latex sap may continue to seep for the first day or two. Change the water if it becomes very cloudy or milky. After 24–48 hours, sap production at the cut end typically stops as the cut heals.
Can I propagate variegated rubber plant varieties (like Tineke or Ruby)?
Yes, the same methods work for all Ficus elastica varieties. Variegated varieties may root slightly more slowly than standard green varieties due to reduced chlorophyll content, which means less photosynthesis energy available for root development.
What should I do with the parent plant after taking a cutting?
The parent plant will produce new growth from the node just below your cut point. If you want to encourage branching (two or more new shoots rather than one), cut back to a node with 2–3 leaves and let the plant produce multiple new shoots. Prune just above a leaf node and the lateral buds will activate.
Written by
Plant Care Club
The Plant Care Club team combines years of hands-on plant parenting with science-based research to create guides you can actually trust. We test, we grow, we learn — so you can too.
94 articles published
Was this helpful?
Thanks for your feedback!
More Care Guides
 Plant Care Tips
How to Propagate Monstera: Stem Cuttings and Air Layering
Learn how to propagate Monstera deliciosa with stem cuttings and air layering. Includes node identification and a complete rooting timeline.
 Plant Care Tips
Monstera Deliciosa Care: The Complete Guide
The definitive Monstera deliciosa care guide. Covers light, watering, chunky soil mix, humidity, moss poles, fenestration, common problems, and all popular varieties.
 Plant Care Tips
Snake Plant Care: The Only Guide You'll Ever Need
The complete snake plant care guide covering light, watering, soil, propagation, and every common problem — from mushy roots to brown tips.