Quick Summary
Bottom watering lets plants absorb water through drainage holes via capillary action. It encourages deeper root growth, prevents fungus gnats, and ensures even soil moisture. Soak for 15-30 minutes, drain, and flush with top watering monthly. Works for most houseplants in pots with drainage holes.
Bottom watering is a technique where you let your plant absorb water from below through the drainage holes instead of pouring water on top. It sounds simple because it is, and it solves several common watering problems in one move. If you have ever dealt with bone-dry soil pockets, persistent fungus gnats, or water-sensitive foliage, bottom watering might just become your new favorite routine.
Why Bottom Watering Works
The science behind bottom watering is straightforward: capillary action. When you place the bottom of a pot in water, the soil acts like a sponge and draws moisture upward through its tiny pore spaces. This natural wicking process saturates the soil evenly from the bottom up, and it comes with several major advantages:
- Encourages deep root growth. Roots grow downward toward the water source, creating a stronger, more resilient root system. With top watering, roots can become lazy and cluster near the surface where water pools.
- Prevents soggy top soil. The surface stays drier, which discourages fungus gnats from laying eggs. Fungus gnat larvae need consistently moist surface soil to survive — bottom watering eliminates that habitat.
- Ensures even moisture. Water wicks up evenly through the soil, eliminating dry pockets that top watering can miss. This is especially important in pots where the soil has compacted or pulled away from the edges.
- Reduces leaf damage. No water splashing on leaves means less risk of fungal spots, especially on plants with fuzzy leaves like African Violets or Begonias.
- Prevents soil displacement. Delicate seedlings and freshly repotted plants stay undisturbed because there is no downward water pressure washing away the top layer.
- Less mess. No water running through the drainage holes onto your furniture, no puddles, no water stains on the leaves.
What You Need for Bottom Watering
The supplies are minimal and you probably already have everything at home:
- A basin, tray, or container — a baking dish, storage container, casserole dish, plant saucer, or your bathtub all work perfectly
- Room-temperature water — cold water can shock roots, especially for tropical plants like Calathea and Peace Lily
- Pots with drainage holes — this is non-negotiable; without holes, there is no wicking
- A timer — your phone works fine; set it so you do not forget your plants are soaking
- A towel or drying rack — for draining pots after soaking
Step-by-Step: How to Bottom Water
- Fill a basin or tray with 1-2 inches of room-temperature water. A baking dish, large saucer, or bathtub all work. The water level should reach roughly one-quarter up the side of the pot.
- Place your potted plant (with drainage holes) in the water. Make sure the pot is stable and not going to tip over.
- Let it soak for 15-30 minutes. The soil will wick water upward through capillary action. Smaller pots (4 inch) may only need 10-15 minutes, while larger pots (8-10 inch) can take up to 30-45 minutes.
- Check the top. When the surface of the soil feels moist to the touch, the plant has absorbed enough. Push your finger about half an inch into the top of the soil — if it feels damp, you are done.
- Remove and drain. Lift the pot out and let excess water drain for a few minutes before placing it back in its saucer. This step is important — standing water beneath the pot defeats the purpose.
- Empty the tray. Do not let pots sit in leftover water. Empty the basin once all your plants have finished soaking.
Pro Tip
Bottom water multiple plants at once by lining them up in a large baking sheet or your bathtub. It turns watering day into a 30-minute set-it-and-forget-it task. Group plants by pot size so smaller ones can be removed first.
How Long to Soak: A Quick Guide
| Pot Size | Soak Time | Water Depth |
|---|---|---|
| 2-4 inch | 10-15 minutes | 1 inch |
| 5-6 inch | 15-20 minutes | 1.5 inches |
| 7-8 inch | 20-30 minutes | 2 inches |
| 9-10 inch | 30-45 minutes | 2-3 inches |
| 12+ inch | 45-60 minutes | 3 inches |
These are starting points. Very dry or compacted soil takes longer. If the top still feels dry after the suggested time, give it another 10 minutes.
Bottom Watering Frequency Guide
How often you bottom water depends on the plant, the season, and your environment. Here is a general guide:
| Plant Type | Summer Frequency | Winter Frequency |
|---|---|---|
| Tropical (Pothos, Philodendron, Calathea) | Every 5-7 days | Every 10-14 days |
| Succulents and Cacti | Every 10-14 days | Every 3-4 weeks |
| Ferns | Every 4-5 days | Every 7-10 days |
| African Violets | Every 5-7 days | Every 7-10 days |
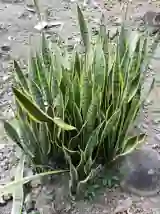
| Snake Plant, ZZ Plant | Every 14-21 days | Every 3-6 weeks |
Always check the soil before watering. The schedule above is a guideline, not a rule. Stick your finger an inch or two into the soil — if it is dry, it is time.
Which Plants Love Bottom Watering?
Almost any plant in a pot with drainage holes can be bottom watered, but these plants benefit the most:
- African Violets — their fuzzy leaves are damaged by water contact, making bottom watering the preferred method
- Calathea and Maranta (Prayer Plants) — benefit from even moisture without wet foliage
- Pothos and Philodendrons — benefit from even moisture distribution throughout the root zone
- Succulents and Cacti — bottom watering ensures deep saturation without wet crowns that invite rot
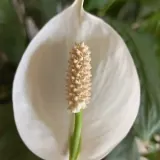
- Peace Lily (Spathiphyllum) — prefers consistent moisture and responds well to thorough bottom soaking
- Begonias — leaves are prone to spotting from water contact
- Cyclamen — crown rot is a major killer, and bottom watering keeps the crown dry
- Seedlings — delicate young plants are easily displaced or damaged by top watering
- Any plant with fungus gnat problems — dry surface soil discourages egg laying
Which Plants to Avoid Bottom Watering
A few plants are better off with top watering or a combination approach:
- Very large pots (14+ inches) — capillary action may not reach the top of very deep soil columns. Top water these or combine both methods.
- Plants in very loose, chunky mixes — orchid bark mixes and extremely airy aroid mixes may not wick water well. You may need a longer soak time or top watering.
- Plants with root rot concerns — if a plant already has root issues, the extended soak can worsen the problem. Address the rot first, then return to bottom watering once the plant is healthy.
Bottom Watering vs. Top Watering: Comparison
| Factor | Bottom Watering | Top Watering |
|---|---|---|
| Moisture distribution | Even throughout the pot | Can leave dry pockets |
| Root growth direction | Encourages downward growth | Roots may cluster near surface |
| Fungus gnat prevention | Excellent (dry surface) | Poor (wet surface) |
| Leaf protection | No water on foliage | Risk of splashing |
| Salt flushing | Does not flush salts | Flushes mineral buildup |
| Speed | Slower (15-45 min soak) | Faster (pour and done) |
| Convenience for multiple plants | Great (batch soak) | One at a time |
| Risk of overwatering | Low (plant takes what it needs) | Moderate (easy to overpour) |
| Works without drainage holes? | No | Yes (carefully) |
| Best for compacted soil | Excellent (rehydrates evenly) | Water runs down edges |
Pro Tip
The best approach is actually a combination. Bottom water most of the time for even moisture and gnat prevention, but top water once a month to flush out mineral and salt buildup. This gives you the benefits of both methods.
When to Still Top Water
Bottom watering does not flush out mineral and salt buildup the way top watering does. Every 4-6 weeks, do a thorough top watering to flush the soil. This prevents white crusty deposits on the soil surface. You will know it is time to flush when you see white mineral deposits forming on the top of the soil or around the drainage holes.
When you do your monthly flush, water slowly from the top until water runs freely from the drainage holes. Let the pot drain completely. This washes accumulated salts downward and out of the soil.
Dealing with Hydrophobic Soil
If your soil has dried out completely and become hydrophobic (water repellent), bottom watering is actually the best way to rehydrate it. Hydrophobic soil happens when peat-based mixes dry out too much — water poured on top just runs down the sides and out the bottom without being absorbed.
To fix this:
- Place the pot in a basin of lukewarm water
- Let it soak for 30-60 minutes (longer than usual)
- Gently press the soil surface to help it absorb
- Add a drop of dish soap to the water — surfactant helps water penetrate hydrophobic peat (use this sparingly and rinse the soil with clean water afterward)
Common Mistakes
- Soaking too long. More than 30-45 minutes for standard pots can waterlog the soil. Set a timer every time.
- Using pots without drainage. Bottom watering only works with drainage holes. No holes, no wicking. If your decorative pot has no holes, use a nursery pot as a liner.
- Forgetting to flush. Monthly top watering is still needed to prevent salt buildup. Mark it on your calendar.
- Using cold water. Cold water can shock tropical plant roots and slow water uptake. Always use room-temperature water.
- Not emptying the tray. Leaving standing water under the pot after soaking creates the exact conditions for root rot that you are trying to avoid.
- Bottom watering pots without well-draining soil. Heavy, clay-based soil wicks slowly and retains too much water. Use a mix with perlite, pumice, or bark for best results.
Frequently Asked Questions
Can I bottom water all my houseplants?
Most houseplants do well with bottom watering as long as they are in pots with drainage holes and well-draining soil. The exceptions are very large pots where capillary action may not reach the top, and plants in extremely chunky mixes like orchid bark that do not wick well.
How do I know when the plant has absorbed enough water?
Check the top inch of soil. When it feels damp to the touch, the plant has soaked up enough. If you are unsure, lift the pot — a fully watered pot is noticeably heavier than a dry one. Over time, you will learn to judge by weight alone.
Will bottom watering fix my fungus gnat problem?
Bottom watering is one of the best defenses against fungus gnats because it keeps the top layer of soil dry, and fungus gnat larvae need moist surface soil to survive. For an existing infestation, combine bottom watering with sticky yellow traps and a soil drench of diluted hydrogen peroxide (1 part 3% hydrogen peroxide to 4 parts water) to kill larvae already in the soil.
Can I add fertilizer to the bottom watering tray?
Yes, you can dissolve liquid fertilizer in the water at half the recommended strength. This is called "fertigation" and it is an efficient way to feed plants while you water. Just remember that bottom watering does not flush out excess fertilizer, so use a lighter dose than you would with top watering and still do your monthly top-water flush.